Last night, I was sitting at a board meeting of my local art guild that I serve as treasurer for and I was considering the value of networking. After all, that is the main reason I joined the guild in the first place. One individual present who just so happens to teach classes on the social media site Facebook stated, "You should never post pictures of your entire artwork because the risk that you creation will be stolen and used without your permission. Also the public won't want to come see your exhibitions because they have seen everything you have to offer on the internet." As I glanced around the table at all my fellow artists, I knew that I was probably the only individual sitting there that happily shares each piece of art as I complete it on a regular basis.
I have taken the approach to chronicle my creative journey that I am embarked on. Partly as a method of journaling my progression and also hopefully by inspiring others to pick up a brush, a canvas and just go PAINT! Grab your camera and shoot pictures of the first thing that grabs your eye. Pick up that sketch pad and a pencil and just start drawing. The important thing is to get creative. Your life and those around you will be greatly enriched.
There is freedom in letting that creative person emerge after years of ignoring him or her. If my posting one piece of art, blog about something I have learned or sharing a problem that I am currently struggling with results in someone letting their buried passion be stirred, then I happily post my work, the ENTIRE painting. After all, we have all heard that "Imitation is the highest form of flattery" and while I'm not hanging in galleries or supporting myself by the sales of my artwork just yet, both are on my goals list. Maybe my thoughts will change as I get closer to my goals but right now, I just want to share the things I learn and be transparent because I hope that others will learn along with me.
This is also my motivation with this blog. I watch as people from all points of this planet, open my pages. I would love to hear more from my readers if there is something that is helpful or if I made you chuckle because you can identify with what I am feeling.
I end this blog post with a photo taken of me enjoying a beautiful Utah afternoon trying to look as if I know how to be an artist plein air style
Tuesday, October 2, 2012
Network your artwork
Labels:
Blog,
brush,
camera,
canvas,
creative,
drawing,
facebook,
flattery,
Imitation,
J Townsend Studios,
Julie Diveley,
Julie Townsend,
paint,
passion,
pencil,
plein air,
sketch,
Social Media,
Vegas Artists Guild
Sunday, September 23, 2012
Back to the basics-WAY BACK!
This blog is somewhat of an embarrassing blog to write because it requires that I make a very personal confession, "I have dirty brushes." Okay, there I have said it for the world to read and so now I can move forward towards my recovery.
You would think that somehow along this journey to becoming an artist, I would have learned how to properly maintain my brushes, but I guess not. I only remember in high school art class washing my brushes in the sink under running water and doing that only until the water ran clear. I thought that was all there was when it came to brush care....(I will continue this blog as soon as you have stopped laughing.)
I became suspiciously aware of the fact that there just be a bit more to paint brush care when I started taking formal painting lessons. Each week, I would arrive to Lily's house to have sitting before me my unfinished painting, a clean palette with little colorful blobs of oil paint and 5 or 6 paint brushes that all had bristles that were well rounded, a sharp point or had a nice sharp edges. The bristles were stiff and a frankly a joy to paint with. I know that a number of my brushes are very old but I have found that when I buy brand new brushes, that before you know it, the edges of the bristles are spread apart and I no longer am able to paint a nice straight detailed line. Even after trying to shape the edges, while the bristles were wet and allowing them to dry on a flat surface I would still have brushes that were far from what Lily had. So a couple of weeks ago I decided to swallow my pride and ask Lily for help.
The paint brush exorcism took place yesterday at the end of my painting lesson when I painfully submitted my brushes to Lily's scrutiny. During my 2 hour lesson, my brushes soaked in cleaning solution suspended by a wire hanger. Just before I was to leave, Lily and I went to her kitchen sink where she pulled out a tub of brush cleaning soap and began to squeezing the bristles and rubbing the brushes vigorously in the palm of her hand.
To my horror, old paint that had worked its way into the ferrule of my brush began to turn the white soap lather into a nasty green-gray color. I think I heard Lily mutter something under her breath about never having seen such dirty brushes.
So here is what I learned about brush care:
1. If the brushes are really dirty you will need to soak them in a brush cleaner solution perhaps as long as overnight. I definitely think that describes my current situation. You want to us a brush washer that allows you to suspend your brushes in the solution without covering the ferrule of your brush.

2. Use a brush soap and get the bristles well lathered. Rub the bristles vigorously in the palm of your hand then squeeze the bristles between your finger and thumb nail to work the old paint out from deep within the base of the bristles and the ferrule. Repeat until your soap lather is white. Leave some lather on your bristles to work as a sizing to allow you to form the desired shape with your fingers.
Now is when the fun really begins. I am off to the store to purchase the necessary items and then I will begin the long process of trying to save my brushes by soaking and soaping them back to life. As you can see, I have my work cut out for me.
You would think that somehow along this journey to becoming an artist, I would have learned how to properly maintain my brushes, but I guess not. I only remember in high school art class washing my brushes in the sink under running water and doing that only until the water ran clear. I thought that was all there was when it came to brush care....(I will continue this blog as soon as you have stopped laughing.)
I became suspiciously aware of the fact that there just be a bit more to paint brush care when I started taking formal painting lessons. Each week, I would arrive to Lily's house to have sitting before me my unfinished painting, a clean palette with little colorful blobs of oil paint and 5 or 6 paint brushes that all had bristles that were well rounded, a sharp point or had a nice sharp edges. The bristles were stiff and a frankly a joy to paint with. I know that a number of my brushes are very old but I have found that when I buy brand new brushes, that before you know it, the edges of the bristles are spread apart and I no longer am able to paint a nice straight detailed line. Even after trying to shape the edges, while the bristles were wet and allowing them to dry on a flat surface I would still have brushes that were far from what Lily had. So a couple of weeks ago I decided to swallow my pride and ask Lily for help.
The paint brush exorcism took place yesterday at the end of my painting lesson when I painfully submitted my brushes to Lily's scrutiny. During my 2 hour lesson, my brushes soaked in cleaning solution suspended by a wire hanger. Just before I was to leave, Lily and I went to her kitchen sink where she pulled out a tub of brush cleaning soap and began to squeezing the bristles and rubbing the brushes vigorously in the palm of her hand.
To my horror, old paint that had worked its way into the ferrule of my brush began to turn the white soap lather into a nasty green-gray color. I think I heard Lily mutter something under her breath about never having seen such dirty brushes.
![]() |
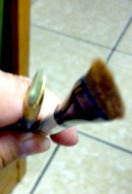
| Yes...that is suppose to be a 3/8 Angle Shader on the right that I apparently have ruined in comparison to a #6 angle brush that with my new gained knowledge won't ruin. |
So here is what I learned about brush care:
1. If the brushes are really dirty you will need to soak them in a brush cleaner solution perhaps as long as overnight. I definitely think that describes my current situation. You want to us a brush washer that allows you to suspend your brushes in the solution without covering the ferrule of your brush.

2. Use a brush soap and get the bristles well lathered. Rub the bristles vigorously in the palm of your hand then squeeze the bristles between your finger and thumb nail to work the old paint out from deep within the base of the bristles and the ferrule. Repeat until your soap lather is white. Leave some lather on your bristles to work as a sizing to allow you to form the desired shape with your fingers.
3. Lay the brush flat on a paper towel to allow to dry. Don't stand them up on the end of the handles as the water will stay in the ferrule and will eventually cause damage to your paint brush handle.

Now is when the fun really begins. I am off to the store to purchase the necessary items and then I will begin the long process of trying to save my brushes by soaking and soaping them back to life. As you can see, I have my work cut out for me.
Sunday, September 2, 2012
No Pain-No Gain
Yesterday, was my scheduled 4th painting lesson. I was anxious to progress on the current oil painting that I am working on of a fallen tree up on Mt. Charleston. The difficult thing for me when it comes to taking these lessons is that I feel insecure because (1.) I'm painting in oils and (2.) my natural approach to the subject is very different from that of my instructor. Each step of the way she gives me instructions on the next process in the piece and often I don't produce the result that she is wanting. Either I am trying to be too detailed, over doing it or not doing enough. This can be frustrating, but as I have stated many times, I am self-taught and obviously in many aspects, self-taught incorrectly. Bad habits can be hard to rid oneself of if they are deeply ingrained and apparently my bad habits have very "deep tap roots".
I was excited to take along my most recent painting that I call, "Memories of the Road Home" and one of which I have been very happy with. As I painted this one, I had tried to remember the points I have learned in the book I am reading by Margaret Kessler entitled, "Painting Better Landscapes" and the things I have learned so far in my 3 previous painting lessons that I have taken with Lily Adamczyk and all in all I thought I had done a pretty good job. Boy was I mistaken!
I was sure that Lily would discuss a few things that I could improve on to make it a better landscape painting. After all, there could only be a few minor changes that I could do to improve it because the overall piece was done well, or at least that was what I thought. It was the last few minutes of my lesson when Lily suggested that we take a look at what I had brought along. She picked the canvas up and in a matter of 30 seconds or so she said..."Do you mind if I...." and she grabbed a roll of masking tape in her other other and began placing pieces of tape in different directions on the surface of my canvas.
I was amazed by her ability to add a few colors together and come up with the perfect matching color to use for those old green shingles. She mixed Alizarin Crimson, Phthalo Green, Black, and White to make the shingles. We also added a blue tint to the path way to give it interest. My other notes include- STAY AWAY FROM WHITE...and throw away your fan brush. An angle brush works great because you don't have to paint every blade grass, rather give the impression of the grass.
I was excited to take along my most recent painting that I call, "Memories of the Road Home" and one of which I have been very happy with. As I painted this one, I had tried to remember the points I have learned in the book I am reading by Margaret Kessler entitled, "Painting Better Landscapes" and the things I have learned so far in my 3 previous painting lessons that I have taken with Lily Adamczyk and all in all I thought I had done a pretty good job. Boy was I mistaken!
![]() | |
| This is my original painting that I had completed that I am calling, "A Memory of the Road Home". |
| Lily giving me a lesson on how to improve my painting |
Labels:
angles,
fallen tree,
grass,
J Townsend Studios,
Julie Townsend,
Lily Adamczyk,
lines,
masking tape,
Missouri,
mixing colors,
old house,
painting lessons,
roof,
shingles,
stone wall,
Swedeborg,
wood slates
Thursday, August 23, 2012
Week 3-Be Patient and Paint the Plan
My oil painting is progressing along nicely and I'm pleased at the progress. I knew that I would learn a lot by taking one on one lessons but I find myself struggling at my home easel now. I'm trying to incorporate the things I have leaned these past 3 lessons into my own works at home and I feel a bit lost. I think this is normal and I just have to keep working at it until I break free of old habits and take my time staying with the plan. Painting TOP to BOTTOM, BACK to FRONT. No cheating even if I can't wait to see how that bright yellow foliage of the Aspen trees are going to pop against those dark green pines.
For the past two years that I have returned to my childhood passion, I have been committed to practicing and have painted nearly 100 pieces. Some of course better than others. I have sold about 8 pieces in that time but have many stacked around the house. I believe I have shown my dedication and have reached that point of taking my art to the next level. Private lessons are what I feel is needed for me to advance to the next level.
I think there are plenty of other new, struggling artists that must feel the same way that I do. At 51 years old, do I have enough time to progress my talent to where I want it to be? Only God knows that answer,but in the mean time I want to either be painting, teaching or sharing what I am learning with others by blogging about my experiences.
For the past two years that I have returned to my childhood passion, I have been committed to practicing and have painted nearly 100 pieces. Some of course better than others. I have sold about 8 pieces in that time but have many stacked around the house. I believe I have shown my dedication and have reached that point of taking my art to the next level. Private lessons are what I feel is needed for me to advance to the next level.
I think there are plenty of other new, struggling artists that must feel the same way that I do. At 51 years old, do I have enough time to progress my talent to where I want it to be? Only God knows that answer,but in the mean time I want to either be painting, teaching or sharing what I am learning with others by blogging about my experiences.
| Original Photo that I chose to use as the inspiration for my first oil painting |
| WK 1- Laying out the composition by sketching the main details using a neutral colored paint |
| WK 1- blocking in the main base colors that will eventually be the mountains, sky and foreground |
| WK 1- Stopping the first lessons with my canvas covered in a layer of acrylic paints. |
Labels:
Aspen,
blue atmosphere,
dead tree,
J Townsend Studios,
Julie Townsend,
Lily Adamsczyk,
log,
Mountain,
Mt. Charleston,
Nevada,
Oil Painting,
painting lessons,
path,
Pine,
shadows,
Sunlight,
Tree
Thursday, August 16, 2012
Something to Think About
As I was studying the book called "Painting Better Landscapes" by
Margaret Kessler, I found on page 24 a gem amongst the technical advice.
Even while you are still visualizing and planning your piece you need to
consider the WHY of the painting. Why are you painting this scene and
what mood are you trying to convey. She says, and I quote, "With in
the limits of convention, paint the ordinary in an extraordinary way.
Don't just decorate: dramatize. Exaggerate motion and color; vary
the value range and textural quality. By emphasizing or downplaying
objects, manipulate the scene to engage the viewer psychologically."
There is freedom in this statement and as an artist I appreciate that I have artistic license to add or remove certain elements to improve my composition. Of course I didn't need to read this in a book to know that as the artist the only boundaries that I have are those invisible ones that I myself have created in my mind. Breaking those chains and tearing down the cobwebs that years of non-creativeness have left isn't always and easy task. I struggle in my compositions with using colors and painting the randomness of nature. I can stand back to observe my piece and realize after hours of work that I have once again painted my bushes to have a manicured symmetry and all lined up like little soldiers at attention and all my rocks are smooth round river rocks.
This is exactly why visualizing and planning are SO important. I must see this painting completed in my mind before I ever start laying out my palette. Sketching my idea out will help me steer away from these composition traps and I am ready to begin. So here is my inspirational photo and I will blog my steps as I work through the teachings outline in this book by Ms. Kessler.
This old homestead photo that we took while on our Missouri vacation is very near to where both my great-grandparents lived. I recall both of their houses on the main dirt road that parallels the highway 133 between Crocker and Richland. My mother was born in a house probably very much like this one there in Swedeborg. I attended the little country school there for both 1st and 3rd grade. It is this exact feeling that I want to evoke with this painting. I want to stir up feelings that include memories of a vibrant house that is full of laughter and that now stands in decay because of neglect and misuse. The memories are still very sweet because they are bigger than the outer shell made of lumber and penny nails.
There is freedom in this statement and as an artist I appreciate that I have artistic license to add or remove certain elements to improve my composition. Of course I didn't need to read this in a book to know that as the artist the only boundaries that I have are those invisible ones that I myself have created in my mind. Breaking those chains and tearing down the cobwebs that years of non-creativeness have left isn't always and easy task. I struggle in my compositions with using colors and painting the randomness of nature. I can stand back to observe my piece and realize after hours of work that I have once again painted my bushes to have a manicured symmetry and all lined up like little soldiers at attention and all my rocks are smooth round river rocks.
This is exactly why visualizing and planning are SO important. I must see this painting completed in my mind before I ever start laying out my palette. Sketching my idea out will help me steer away from these composition traps and I am ready to begin. So here is my inspirational photo and I will blog my steps as I work through the teachings outline in this book by Ms. Kessler.
This old homestead photo that we took while on our Missouri vacation is very near to where both my great-grandparents lived. I recall both of their houses on the main dirt road that parallels the highway 133 between Crocker and Richland. My mother was born in a house probably very much like this one there in Swedeborg. I attended the little country school there for both 1st and 3rd grade. It is this exact feeling that I want to evoke with this painting. I want to stir up feelings that include memories of a vibrant house that is full of laughter and that now stands in decay because of neglect and misuse. The memories are still very sweet because they are bigger than the outer shell made of lumber and penny nails.
| Old House Ruins located in Swedeborg, Missouri |
| Ivy covered log located in what is left of the yard of the old house |
Labels:
artistic license,
composition,
Crocker,
decay,
grandparents,
great-grandparents,
home,
homestead,
Margaret Kessler,
memories,
Missouri,
neglect,
planning,
Richland,
ruins,
sketch,
Swedeborg
Sunday, August 12, 2012
Making a Plan
I've started reading a book called "Painting Better Landscapes" by Margaret Kessler and right off I knew I was in trouble. The book begins as soon as page 14 talking about a plan...You are supposed to have a VALUE PLAN. Ms. Kessler states," Planning the values in your sketchbook is probably the most neglected aspect of the painting process. I cannot overemphasize its importance." I guess that says it pretty clearly.
Sketching out my plan with pencil or charcoal is something I have never done up to this point. I just start a new piece by covering the canvas with paint and then painting, excuse me for using the old saying, "by the seat of my pants". I was keenly aware that on my first painting lesson, that while we didn't grab a pencil, my teacher, Lily Adamczyk had me block out all the main areas of my painting using a neutral colored paint. She quickly planned which trees we wanted to emphasize and which ones were in the wrong place in my photo. When I actually started painting, I had a plan. Of course it was Lily's plan because at this point, I'm still very much lost in the transition between using acrylic to oil and trying to understand Lily's approach and techniques. Let me show you what I mean...
Here is what my masterpiece looked like at the end of my first two hour lesson.
Ms. Kessler lists on page 8 of her book the five progressive steps to construct a painting:
So today, I'm digging out those very neglected sketching pencils, overused kneadable eraser and grabbing one of the many empty sketchbooks that are in my studio so that I can begin to discipline myself to MAKE A PLAN first, before I ever grab a canvas or pick up a brush.
Sketching out my plan with pencil or charcoal is something I have never done up to this point. I just start a new piece by covering the canvas with paint and then painting, excuse me for using the old saying, "by the seat of my pants". I was keenly aware that on my first painting lesson, that while we didn't grab a pencil, my teacher, Lily Adamczyk had me block out all the main areas of my painting using a neutral colored paint. She quickly planned which trees we wanted to emphasize and which ones were in the wrong place in my photo. When I actually started painting, I had a plan. Of course it was Lily's plan because at this point, I'm still very much lost in the transition between using acrylic to oil and trying to understand Lily's approach and techniques. Let me show you what I mean...
Here is what my masterpiece looked like at the end of my first two hour lesson.
![]() |
| The Initial Plan |
![]() | |||||
| Blocking out the colors of the background and the foreground |
![]() | |||||||||||||||||||||||||||||||||||||||||
| Working from Top to Bottom, Back to front |
Ms. Kessler lists on page 8 of her book the five progressive steps to construct a painting:
- Visualize the idea
- Composing the idea (blueprint)
- Establishing the values (foundation)
- Blocking the color harmony (framework)
- Refind the details (finishing)
So today, I'm digging out those very neglected sketching pencils, overused kneadable eraser and grabbing one of the many empty sketchbooks that are in my studio so that I can begin to discipline myself to MAKE A PLAN first, before I ever grab a canvas or pick up a brush.
Monday, August 6, 2012
Naples Yellow-SUNSHINE in a Tube
Since I am a self-taught artist, with little or
no formal training to speak of, my knowledge of mixing colors is very basic and
is mostly what Mr. Easton taught me in high school art class in Eldon, Missouri. I have spent the past 2 years, going
through bottles of white acrylic paint because logic told me that to lighten a
color, add white. I would add white to my colors if I wanted to gradually
lighten the base color or to add a refection. If you add white to green
or brown it results in a color that is lighter but often I noticed that the
color seemed to loose the vibrancy and actually become duller and even
gray. I couldn't figure out why other artists have the ability to paint
beautiful landscapes that reflect bright blue skies, striking sunsets or
sparkling water. Heck, even their dirt is brighter than mine it seems.
At my first painting lesson two weeks ago, I was introduced to an amazing color that I had never heard of before...NAPLES YELLOW. It is a mixture of white and yellow ochre and maybe something else. You can find all the specific chemistry used to create this color online, but to me, it is like having SUNSHINE in a tube! I went right out and bought myself some and couldn't wait to compare the colors that I could mix.
I also found that I am not alone in my praise of this pigment. I found a very well written explanation on an artist forum called "Wet Canvas" that I thought I would include.
Larry says...."As
a plein air painter of subjects outdoors...I generally observe that
light and color appear warmer. It is difficult imitating color we see
outdoors in natural light, and our tendency is to add white to
"brighten" as well as lighten a color. What I have observed quite some time ago is that white is a cool color
(generally speaking)...and yes, it tints...but it also cools the color
down and flattens its potential for three dimensional punch. Cooling
down or neutralizing works against the notion of "brightening"...and is
thus counter productive for me.
What I use as a substitute for tinting closer color to maintain warmth and yet lighten is Naples Yellow. It makes lovely tints that feel warmer. As a color goes back I'll use some Naples Yellow plus white since that color would begin to lose its sense of nearness to the eye anyway, and if I want the color to appear even further back I'll use just the white to tint.
I try to be sparing with my use of white so that particular highlights I want will pop with greater depth illusion. Of course it is not always possible to avoid white...so I'll often add a bit of Naples to the mix after using white to restore some of the warmth lost.
Some will argue against this, as is their right...but such thinking has worked for me for umteen years, and I think where painting is concerned the ends does justify the means. Proof is in the pudding as they say..."
What I use as a substitute for tinting closer color to maintain warmth and yet lighten is Naples Yellow. It makes lovely tints that feel warmer. As a color goes back I'll use some Naples Yellow plus white since that color would begin to lose its sense of nearness to the eye anyway, and if I want the color to appear even further back I'll use just the white to tint.
I try to be sparing with my use of white so that particular highlights I want will pop with greater depth illusion. Of course it is not always possible to avoid white...so I'll often add a bit of Naples to the mix after using white to restore some of the warmth lost.
Some will argue against this, as is their right...but such thinking has worked for me for umteen years, and I think where painting is concerned the ends does justify the means. Proof is in the pudding as they say..."
Larry (09-12-2005, 03:35 PM http://www.wetcanvas.com/forums/archive/index.php/t-294388.html)
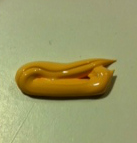
First I took Hooker Green and mixed a small
amount of white. I also took the same amount of Hooker Green and mixed it
with an equal portion of Naples Yellow. You can see my second mixture has
a warmer glow than does the first. I have experienced Hooker Green
turning a gray tone very easily when I'm trying to paint a variety of foliage.
Trees don't look that gray to me so this isn't something I want to find
happening on my palette.
The second color I mixed was using my bottle of
Apple Barrel Chocolate Bar Brown as the base color. This really showed
the remarkable difference in tone and vibrancy as you can see by the photo below. Naples Yellow has
definitely won a big place on my palette.
Check out my website to see all my available artwork. julietownsendstudio.com. I would love to hear from you.
Labels:
Acrylic,
Art Class,
Brighten,
Cool,
Easton,
Eldon,
High School,
J Townsend Studios,
Julie Townsend,
Missouri,
Mixing color,
Naples Yellow,
Nevada,
Sunshine,
Tinting,
vibrant,
Warm,
warmer,
white,
yellow
Subscribe to:
Posts (Atom)